Yamaha -TX500 Tracker
Yamaha -TX500 Tracker
-
£0.00
-
Product Code:Yamaha
-
Availability:In Stock
Dirty little stop-out
Sometimes we really struggle with a custom build, especially when the donor bike is a wee minter. That certainly was the case when this beautiful little 1970’s Yamaha TX500 rolled into the shop looking a little faded and jaded but with all the lumps and bumps in the right places.
This bike gets used, all year round, most days of the week so whatever we done, it had to be usable. After a chat with Stevie, her owner for the last 20 odd years, it was clear that the pair had fallen out of love so we had to do something to make the yam a little more attractive.
As luck would have it, we had another 70’s Yamaha in the workshop well on its way down the cafe racer route. This was an XS500 which is virtually the same bike as the TX save for a few bits of body work. “She’s nice, but the drop bars would wreck my back” was the reply when Stevie clocked the XS, so that gave us an idea of where to go with the TX.
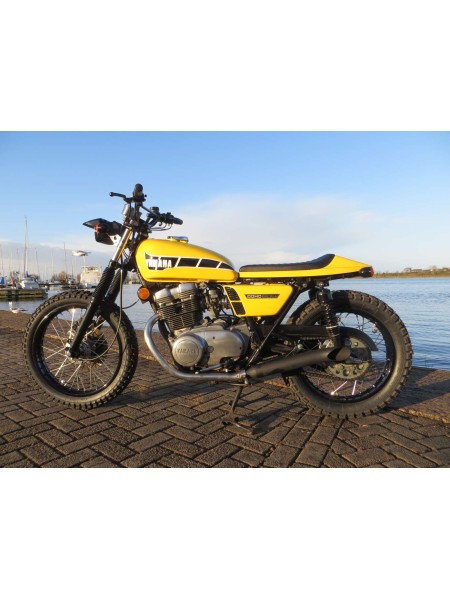
Sit-up riding position, nice wide comfy bars... it could only be a flat-tracker. Without further ado, we unbolted the seat, sat a flat-track tail piece on and bolted a set of straight bars to her... bingo!
Stevie loved the look and gave us the OK to take the build down the tracker road. I’d been looking to build a flat-tracker for a while, I even have an old SR500 which is the perfect donor bike, but it’s even better to build a bike for a customer so the SR will have to wait its turn. It was probably the shortest consultation in history, for a custom build.
I showed Stevie a few photos of flat-trackers and he just told us to call him when it was ready. Initially he wanted to keep the colour original, but years of sunlight had not been kind to the paintwork which was now a faded salmon colour in places so the bike would need painted regardless.
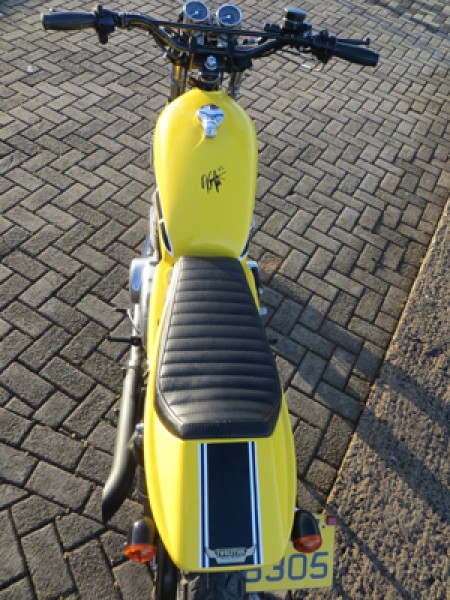
For me, Kenny Roberts yellow with the Yamaha stripes are the only way to go for a 70s yam. Initially Stevie was unconvinced but he rolled with it and at the reveal he was blown away.
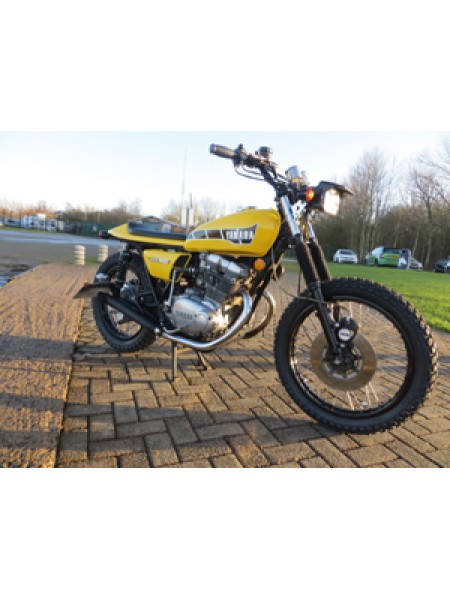
The Build We started by stripping the wheels which were a bit manky. The rims were powdercoated gloss black, hubs polished and the entire ensemble was strung together with stainless spokes and dressed with a pair of Heidenau K60 enduro style tyres to make a job of it.
The forks were also stripped and upgraded to a slightly heavier spring. The lower legs were powdercoated to match the rims. A new set of shocks were fitted to give a little more lift at the rear, but not too much to throw off the geometry.
We fabricated a new rear subframe to hold the tailpiece/seat combo, it even flips up like the old seat to gain access to the electrics which have been mounted under the seat. The trend with trackers is to get rid of the side casings and fit a big bold numberplate.
Bearing in mind this bike gets used regularly in all conditions, we didn’t want to risk exposing the electrics to the elements. Besides, the stock side casings look ace, the cutaway vents are original retro, so we just removed the massive standard air-box, fitted a set of cone-filters and upped the main jets to make her run as well as she looks.
The old end-cans were beyond repair, so we ditched them and fitted a nice set of matt black turnout twin mufflers, which look great and also give this bike a real bark. We initially had a traditional tracker style numberplate on the front with a pair of mini spots, but decided to ditch this idea and put a proper light on the front.
A nice rectangle light with a flip-up cover gives excellent light and is a case of function over form. The subtle black bullet style indicators sit nicely either side of the headlight, with a matching pair at the rear... safety first and all that!
The original Yamaha tank badges were in a terrible state, but we managed to salvage them, bring them back to bare metal and hand paint them back to life. Restoring those badges was probably one of the most time consuming parts of the build but they don’t make them like that anymore, and a sticker just wouldn’t do it justice.
Now they will live to fight many more days. The engine in these bikes is pretty indestructible, so we opted to leave the internals alone and instead give the exterior a bit of a clean and tidy. Little did we know but the yam hadn’t been charging the battery for years. A casual conversation revealed that Stevie had replaced the battery a couple of times a year.
There was a slight charge going into the battery which just about maintained 12 volts with no electrics on, but ride the bike at night, and she would eventually die. We found his separate regulator and rectifier units had burned out and replacement units were inordinately expensive, so we took a gamble.
We bought an aftermarket Suzuki regulator/rectifier combined unit for about £30. It had the same amount of wires (3 yellow a red and a black). We hooked it up and it worked a treat!
We got rid of all the redundant lights and stripped yards of wire from the loom. A neat stainless steel set of mini clocks were fitted with a high-beam telltale plugged onto the top of the headlight to keep the MOT men happy.
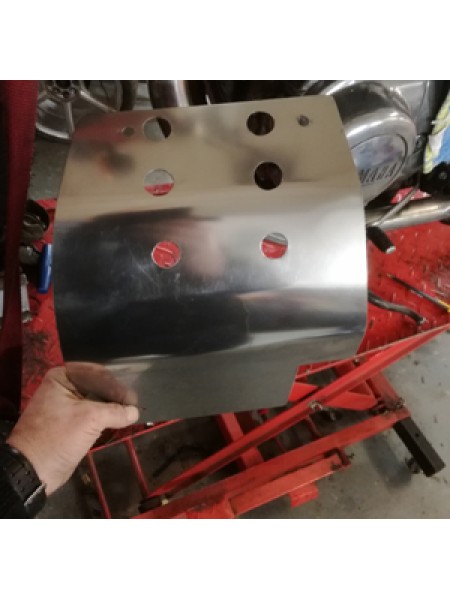
We fabricated a nice side-mount numberplate bracket from which the slightly more aerodynamic plate will be hung once the MOT has been passed. At the last minute Stevie suggested a sump guard... great idea.
So we handmade a nice guard from a sheet of stainless steel which not only looks great but will offer real protection to the yam’s undercarriage. A coat of vibrant yellow base coat and she was ready for the decals complete with Kenny Roberts autograph! When the tins came back from paint fully lacquered up, she looked simply stunning.
All that remained was to fit the original badges and take er out for a bit of dirty dancing. On the road she handles like a dream, really light and agile. The one thing you can’t control is the fun factor.
Twist the throttle and she growls into life. People and pets stop and stare when the TX roars down the road, but nothing can prepare you for the permanent grin etched on your mug when riding this wee minx.
I had to stop, get off the bike and scowl, just because my face was hurting from all the grinning! If you spot Stevie out and about make sure to give him a thumbs-up. You’ll easily recognise him... he’s the one with the massive grin on his face.

